My first page features the My Mind's Eye wood circles, and the second page uses the Simple Stories metal charms. Let's take a look!
DRIVING MISS JENSIE
When my daughter was learning how to drive she had to log a certain amount of hours of driving. My husband and I would pick her during her lunch break at school and drive around with her through the local neighborhoods. I love this picture I snapped of her concentrating on the road with my husband giving her tips as she drove along. I used the Picture Perfect Classic kit to document this fun memory.
I sometimes struggle knowing how to fill the space of a large 12x12 page when I only have one photo to scrap, so for this page I used a sketch by Laura Whitaker to get me going. I love the band going across the center with the stitched circles. I added a sprinkling of mist, wood circles and stickers to give it a playful feel.
I created a cluster of embellishments on the left bottom corner of my photo by starting with the darling feather die cut from the kit. I then tucked in several other stickers, a wood circle, die cuts, a phrase sticker, and then stitched on one of the bow paper clips.
On the right side of the page, I used more wood circles with a bird resting on one of them. I also stepped down my design diagonally by using die cuts and stickers layered over one another. My title is a play on the movie title "Driving Miss Daisy." A few droplets of Heidi Swapp Blush Color Shine and a few hand-stitched circles finishes it off!
TODAY
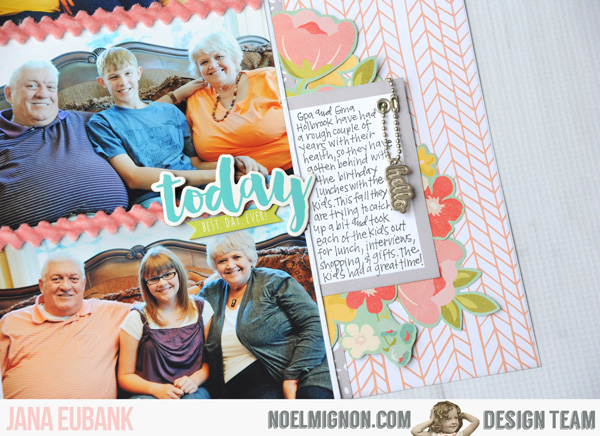
For this next page, I decided to incorporate the Simple Stories charms included with the Picture Perfect Classic Kit.
I had three similar photos from three different occasions of my parents taking my kids on a birthday lunch date. I decided to scrap them all together on one page by stacking them vertically on the page.
The colors of the clothing in these photos inspired me to use a color scheme of coral, aqua, gray, and yellow. I fussy-cut the flowers from the My Mind's Eye paper to frame out my photos and add a downward diagonal design to this page across the vertical line of photos.
I separated the photos with a length of Maya Road velvet ric rac. I layered a few Simple Stories chipboard circles over the flowers on the left. I added a rhinestone to the center of each one to add a bit of shine to tie them in to the shiny charms in other places on the page.
I tucked a journal block under the right side of the photos and decided that this would be a fun place to hang one of the charms. I got out my trusty eyelets from years past to create a hole for the charm's ball chain to go through. I adhered the charm with a foam dot to keep it in place. It's so cute!
I took the other charm off of the ball chain and placed it at the bottom of the page to accent a label with the date for my page. I secured it in place with a couple of mini staples.
So there ya go! Two pages featuring two different types of dimensional embellishments: wood circles and metal charms. I hope that it has helped you with a few ideas in how to use the items in *your* Picture Perfect kit this month.
See you again soon!


No comments:
Post a Comment